
Earlier this year at one of our events a woman seeing the quality and craftsmanship of my work, asked me if I could do a repair/replacement of a reed holder on her loom. I said I believe I could and would be up for the challenge. About a week later she contacted me with some pictures and told me what needed to be replaced, we also worked out a time to meet up so I could see it in person. After looking at it I could see what exactly needed to be done. Then we went over everything to make sure it would work properly and do everything she wanted it to when I was finished. It needed to be level with the eyes of the loom, spin freely, come in and out and also unscrew so she could put the reed in.
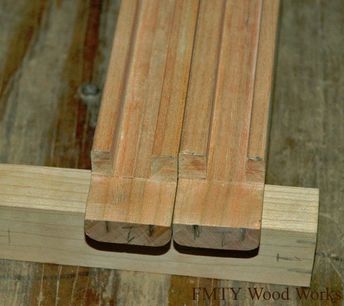
After doing some measuring and figuring out how I would do it, I got started on the holder itself, the legs would come later. The first thing was to cut a centered 1\2" notch half way into the wood I was using. I tried using a router table for this but it did not work as I had a bit that was just too small and it would catch if I tried going over the piece again to bring the hole to width. So I had to make new pieces and try again, this time I used the table saw with a dado blade. My dad helped me cut out the width and I cleaned up most of the saw marks with some sand paper. Finally after getting those done I cut all the pieces to size and notches on the ends so the side pieces would inset.
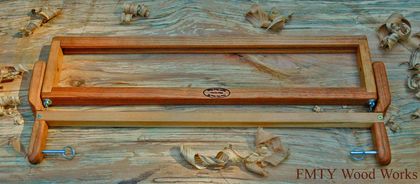
Now that I had the frame parts finished I needed to drill holes for the screws and the hanger bolts. I used hanger bolts and wing nuts so that she could unscrew and take the top off when ever she wanted. I clamped the pieces loosely together just enough to hold them, then I drilled the holes while the pieces were exactly where I needed them.
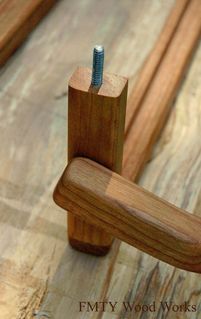
I then got started on making the swivel part of the reed holder. I drilled some holes on the side pieces big enough for a brass tube to fit in, which I will then insert a small piece of iron rod for it to spin freely. I did the same process for the legs.

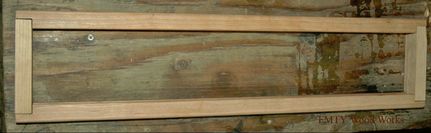
After finishing the frame I then got on the legs. The loom has a inside diameter of just over 26'' long, the reed is 24'' long and the frame needed side pieces at least 3/4'' thick to accommodate for the hanger bolts and the legs need to be the same thickness as the side pieces, leaving me with 30 ''. So I needed to figure out a way to have the legs curve in to make it work. I decided the best way for me to do it would be to cut the legs on the band saw from one solid piece. I spent a lot of time just measuring and figuring out how everything would come together but when I finally finished the legs I was happy with the how they looked.
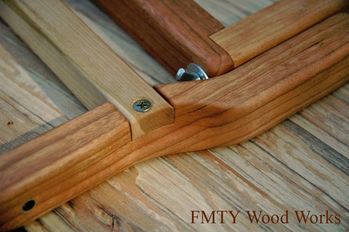
The last piece to do was the cross brace to keep it solid. I cut the piece to fit in-between the legs, along with some extra room to overlap them for a couple screws. I carved out the ends to fit smoothly up against the sides, along with some drilling for the screws and some more carving to blend everything in.
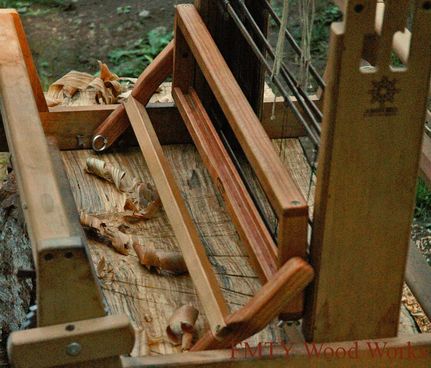
Now that the reed holder was done I needed to drill some holes and put brass tubes in the legs and the frame to to have the ability to use locking pins so she can take it in and out. To drill perfect holes in the frame I drilled a hole through a piece of scrap wood on my drill press, using the same drill bit I later used for the frame. I started my hole just a little bit on the frame, then put the drill bit through my scrap piece of wood and started drilling the hole with the piece flat against the surface, this gave me a perfectly straight hole. I also clamped another scrap piece on the other side to prevent any breakout. Now that everything was done I did some finish sanding and oiled it, I use mineral oil since it doesn't smell and no one's allergic to it.
The last several custom orders I have done have not been easy, but I'm glad I did them and I have learned a lot through the process. I have gained more confidence in my skills and feel more confident taking on bigger projects as I improve all the more.
 RSS Feed
